{"metadata":{"kernelspec":{"language":"python","display_name":"Python 3","name":"python3"},"language_info":{"pygments_lexer":"ipython3","nbconvert_exporter":"python","version":"3.6.4","file_extension":".py","codemirror_mode":{"name":"ipython","version":3},"name":"python","mimetype":"text/x-python"}},"nbformat_minor":4,"nbformat":4,"cells":[{"cell_type":"markdown","source":"# **EXPLORE LONG-LASTING GRAVITATIONAL WAVES**\n\n\n\n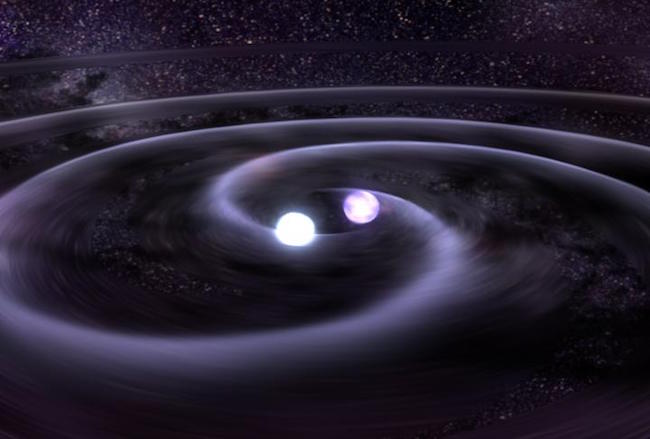","metadata":{}},{"cell_type":"markdown","source":"#### If this helped in your learning, then please UPVOTE – as they are the source of motivation!","metadata":{}},{"cell_type":"markdown","source":"**Inspired by Laura Fink's Kernel, Here is the Link of the Kernel:** [Here](https://www.kaggle.com/code/allunia/signal-where-are-you)","metadata":{}},{"cell_type":"markdown","source":"Ok Now we can say that some of us worked on signals and spectrograms creation and classifying the waves using only them with Machine Learning Models. we now into the much deeper topic in the field of Gravitational Waves. we don't have simple files, we have HDF files which I will explain later. But don't worry, we all are here to learn something new 😀, so now let's do some preprocessing with the given data to understand the data. First of all we need to know **what is Gravitational Waves ?**\n\nBelow is the Link of the video which will just clear your understanding regrading waves:\n","metadata":{}},{"cell_type":"code","source":"from IPython.display import HTML\nHTML('')","metadata":{"execution":{"iopub.status.busy":"2022-10-28T12:08:46.253654Z","iopub.execute_input":"2022-10-28T12:08:46.254124Z","iopub.status.idle":"2022-10-28T12:08:46.291754Z","shell.execute_reply.started":"2022-10-28T12:08:46.254034Z","shell.execute_reply":"2022-10-28T12:08:46.290797Z"},"trusted":true},"execution_count":null,"outputs":[]},{"cell_type":"markdown","source":"# **WHAT AND WHYS OF CONTINUOUS GRAVITATIONAL WAVES**\n\n* Continuous gravitational waves emitted from spinning neutron stars, they are extremely weak but the importance is : **they can tell us the interior of the neutron stars, which can not be told by Electromagnetic waves**\n\n\n* However, the most important LIGO Search targets for continuous Gravitational waves are neutron stars in our own Galaxy. Moreover, Over short times, a continuous gravitational-wave signal from a Galactic neutron star will look almost perfectly constant in both frequency and amplitude, as seen in Figure below for a 0.1 second interval.\n\n\n\n\n\n\n* However, over longer durations, the frequency of the signal will slowly change, for two reasons. The first reason is that, as the neutron star emits gravitational and electromagnetic waves, it loses energy which causes it to rotate more slowly. The second reason is that the detector here on Earth is moving with respect to the neutron star, which changes the frequency of the gravitational waves observed in the detector. The manner in which the signal frequency changes is illustrated in below images:\n\n**About Image:**\n\n* The top panel shows the frequency, in blue, changing with a daily cycle due to the rotation of the Earth. The middle panel zooms out to show the frequency, in red, changing on a year's time scale due to the orbit of the Earth around the Sun. The bottom panel zooms out further to show how the frequency, in green, slowly decreases due to the rotation of the neutron star itself slowing down over many years. \n\n\n\n\n* So Tracking of all possible frequency changes make it more difficult and computationally challenging for detecting the continuous gravitational waves.\n\n\nThere is a video which will give you a broad understanding of the CW: [Video](https://www.youtube.com/watch?v=7xIAHdDipNg)","metadata":{}},{"cell_type":"code","source":"import matplotlib.pyplot as plt\nfrom scipy import stats\nimport librosa.display\nfrom tqdm import tqdm\nfrom glob import glob\nimport seaborn as sns\nimport pandas as pd\nimport numpy as np\nimport warnings\nimport librosa\nimport h5py\nimport gc\n\nclass bcolors:\n HEADER = '\\033[95m'\n OKBLUE = '\\033[94m'\n OKCYAN = '\\033[96m'\n OKGREEN = '\\033[92m'\n WARNING = '\\033[93m'\n FAIL = '\\033[91m'\n ENDC = '\\033[0m'\n BOLD = '\\033[1m'\n UNDERLINE = '\\033[4m'\n\n \n \nwarnings.filterwarnings(\"ignore\")\n\nTRAIN_PATH = '../input/g2net-detecting-continuous-gravitational-waves/train'\nTEST_PATH = '../input/g2net-detecting-continuous-gravitational-waves/test'\nTRAIN_LABELS_PATH = '../input/g2net-detecting-continuous-gravitational-waves/train_labels.csv'\n\n\ntrain_paths = glob(TRAIN_PATH+'/*')\ntest_paths = glob(TEST_PATH + '/*')","metadata":{"execution":{"iopub.status.busy":"2022-10-28T12:08:55.67257Z","iopub.execute_input":"2022-10-28T12:08:55.673014Z","iopub.status.idle":"2022-10-28T12:08:58.148336Z","shell.execute_reply.started":"2022-10-28T12:08:55.672981Z","shell.execute_reply":"2022-10-28T12:08:58.1471Z"},"trusted":true},"execution_count":null,"outputs":[]},{"cell_type":"code","source":"def show_values_on_bars(axs, h_v=\"v\", space=0.4):\n\n \n def _show_on_single_plot(ax):\n if h_v == \"v\":\n for p in ax.patches:\n _x = p.get_x() + p.get_width() / 2\n _y = p.get_y() + p.get_height()\n value = int(p.get_height())\n ax.text(_x, _y, format(value, ','), ha=\"center\") \n elif h_v == \"h\":\n for p in ax.patches:\n _x = p.get_x() + p.get_width() + float(space)\n _y = p.get_y() + p.get_height()\n value = int(p.get_width())\n ax.text(_x, _y, format(value, ','), ha=\"left\")\n\n if isinstance(axs, np.ndarray):\n for idx, ax in np.ndenumerate(axs):\n _show_on_single_plot(ax)\n else:\n _show_on_single_plot(axs)","metadata":{"execution":{"iopub.status.busy":"2022-10-12T09:21:41.043969Z","iopub.execute_input":"2022-10-12T09:21:41.045217Z","iopub.status.idle":"2022-10-12T09:21:41.054714Z","shell.execute_reply.started":"2022-10-12T09:21:41.045141Z","shell.execute_reply":"2022-10-12T09:21:41.053562Z"},"jupyter":{"source_hidden":true},"trusted":true},"execution_count":null,"outputs":[]},{"cell_type":"markdown","source":"# **DATA AND TARGET LABELS WE HAVE:**","metadata":{}},{"cell_type":"markdown","source":"* we are provided with a training set containing time-frequency data from two gravitational-wave interferometers (LIGO Hanford & LIGO Livingston). Each data sample contains either real or simulated noise and possibly a simulated continuous gravitational-wave signal (CW).\n\n* The task is to identify when a signal is present in the data (target=1), if it is not then (target=0) and the third case is (target=-1) which means that Physicists are currently unable to determine the status of these files.\n\n* Train and Test data is in the form of HDF Files with (.hdf5 extension). First we understand the HDF FILES.\n","metadata":{}},{"cell_type":"code","source":"train_label = pd.read_csv(TRAIN_LABELS_PATH)\ndisplay(train_label.head())","metadata":{"execution":{"iopub.status.busy":"2022-10-12T09:21:41.094801Z","iopub.execute_input":"2022-10-12T09:21:41.095251Z","iopub.status.idle":"2022-10-12T09:21:41.111301Z","shell.execute_reply.started":"2022-10-12T09:21:41.095207Z","shell.execute_reply":"2022-10-12T09:21:41.110051Z"},"trusted":true},"execution_count":null,"outputs":[]},{"cell_type":"code","source":"plt.figure(figsize=(8,6))\nax1 = sns.countplot(x='target',data=train_label,palette=['#caf0f8','#00b4d8','#0077b6'])\nshow_values_on_bars(ax1, h_v=\"v\", space=0.4)\nax1.set_xlabel(\"Target Label\", size = 18, weight=\"bold\")\nax1.set_ylabel(\"\")\nax1.set_yticks([])","metadata":{"execution":{"iopub.status.busy":"2022-10-12T09:21:41.119894Z","iopub.execute_input":"2022-10-12T09:21:41.120313Z","iopub.status.idle":"2022-10-12T09:21:41.311999Z","shell.execute_reply.started":"2022-10-12T09:21:41.120276Z","shell.execute_reply":"2022-10-12T09:21:41.31048Z"},"trusted":true},"execution_count":null,"outputs":[]},{"cell_type":"markdown","source":"Ok we see that we have little amount of -1 which I explained above. and we have not much amount of labels here and as according to the competition host, we have to generate more data for ourselfs to analyze more deeper. but first explore these data 🕶","metadata":{}},{"cell_type":"markdown","source":"# **HDF FILES**\n\n* HDF supports a variety of data types: scientific data arrays, tables, and text annotations, as well as several types of raster images and their associated color palettes.\n\nSome of the features of HDF are:\n* HDF makes it possible for programs to obtain information about the data from the data\nfile itself, rather than from another source.\n* HDF standardizes the format and descriptions of many types of commonly used data sets,\nsuch as raster images and scientific data.\n* HDF is a platform independent file format. It can be used on many different computers,\nregardless of the operating system that machine is running.\n* New data models may be added to HDF by either the development team or HDF users.\n\n### IT LOOK LIKE THIS:\n\n","metadata":{}},{"cell_type":"code","source":"sample_data = h5py.File(TRAIN_PATH+'/001121a05.hdf5', 'r')\nsample_data","metadata":{"execution":{"iopub.status.busy":"2022-10-12T09:21:41.314939Z","iopub.execute_input":"2022-10-12T09:21:41.315813Z","iopub.status.idle":"2022-10-12T09:21:41.336332Z","shell.execute_reply.started":"2022-10-12T09:21:41.315737Z","shell.execute_reply":"2022-10-12T09:21:41.334318Z"},"trusted":true},"execution_count":null,"outputs":[]},{"cell_type":"markdown","source":"Ok Now we use special library for reading the HDF files. it clearly shows that we have open the data in read form and to confirm that we have open the right file, it shows the name with extension.\n\nThe File object is your starting point. What is stored in this file? Remember h5py.File acts like a Python dictionary, thus we can check the keys,","metadata":{}},{"cell_type":"code","source":"store_data = sample_data['001121a05']\nprint(sample_data['001121a05'])","metadata":{"execution":{"iopub.status.busy":"2022-10-12T09:21:41.33958Z","iopub.execute_input":"2022-10-12T09:21:41.340896Z","iopub.status.idle":"2022-10-12T09:21:41.357259Z","shell.execute_reply.started":"2022-10-12T09:21:41.340733Z","shell.execute_reply":"2022-10-12T09:21:41.355415Z"},"trusted":true},"execution_count":null,"outputs":[]},{"cell_type":"markdown","source":"It seems like '001121a05' file have 3 members. Ummm.. So what can be the members ? \nYes you are right these are the features which we need for exploration.\n\nThree Members:\n* 'H1', \n* 'L1', \n* 'frequency_Hz'\n\nDon't Know what these are ? do not worry about it. I explained it here :)\n\n\n* L1 - data from the LIGO Livingston interferometer\n* H1 - data from the LIGO Hanford interferometer\n* frequency Hz - the range frequencies measured by the detectors - shape (360,)\n* STFs - Short-time Fourier Transforms (SFTs) - shape (360, n)\n* timestamps - the timestamps that the STFs correspond to - shape (n,)\n\n\n**THE STRUCTURE IS HERE:**\n\n\n\n\n\n**Thanks to Ravi for beautiful Explanation Here:** \n\nResource: [Understanding the Data](https://www.kaggle.com/competitions/g2net-detecting-continuous-gravitational-waves/discussion/358444)","metadata":{}},{"cell_type":"code","source":"H1 = store_data['H1']\nL1 = store_data['L1']\nprint('=== H1 =====')\nprint(H1.keys())","metadata":{"execution":{"iopub.status.busy":"2022-10-12T09:21:41.361388Z","iopub.execute_input":"2022-10-12T09:21:41.361973Z","iopub.status.idle":"2022-10-12T09:21:41.37127Z","shell.execute_reply.started":"2022-10-12T09:21:41.361936Z","shell.execute_reply":"2022-10-12T09:21:41.36977Z"},"trusted":true},"execution_count":null,"outputs":[]},{"cell_type":"markdown","source":"Now what are these ?, SFTs and timestamps_GPS. Let's understand them one by one.\n\n# **Short-time Fourier Transforms (SFTs):**\nShort-time Fourier transform (STFT) is a sequence of Fourier transforms of a windowed signal. The short-time Fourier transform (STFT) is used to analyze how the frequency content of a nonstationary signal changes over time. The magnitude squared of the STFT is known as the spectrogram time-frequency representation of the signal.\n\n* First Understand the Fourier transforms: The Fourier Transform takes a time-based pattern, measures every possible cycle, and returns the overall \"cycle recipe\" (the amplitude, offset, & rotation speed for every cycle that was found).\n\n**LAURA FRANK explained the Fourier Transform very well, to get the grip on Signal processing, Fourier Transform and how it works, just take a look on LAURA FINK'S NOTEBOOK:** [HERE](https://www.kaggle.com/code/allunia/signal-where-are-you)\n","metadata":{}},{"cell_type":"code","source":"HTML('')","metadata":{"execution":{"iopub.status.busy":"2022-10-12T09:21:41.372928Z","iopub.execute_input":"2022-10-12T09:21:41.373429Z","iopub.status.idle":"2022-10-12T09:21:41.386417Z","shell.execute_reply.started":"2022-10-12T09:21:41.373373Z","shell.execute_reply":"2022-10-12T09:21:41.385065Z"},"trusted":true},"execution_count":null,"outputs":[]},{"cell_type":"code","source":"SFTs = H1['SFTs']\ntimestamp = H1['timestamps_GPS']\nprint(\"====== SFTs ======\")\nprint(SFTs[0:1])\nprint(\"====== Timestamp ======\")\nprint(timestamp[0:1])","metadata":{"execution":{"iopub.status.busy":"2022-10-12T09:21:41.387912Z","iopub.execute_input":"2022-10-12T09:21:41.389194Z","iopub.status.idle":"2022-10-12T09:21:41.408243Z","shell.execute_reply.started":"2022-10-12T09:21:41.389159Z","shell.execute_reply":"2022-10-12T09:21:41.407055Z"},"jupyter":{"source_hidden":true},"trusted":true},"execution_count":null,"outputs":[]},{"cell_type":"markdown","source":"* --> read_hdf function is designed to read the data of train and test","metadata":{}},{"cell_type":"code","source":"# Function referenced form other kernel, Link is here: https://www.kaggle.com/code/ryanluoli2/explore-the-training-data-files\nfreq = []\n\ndef read_hdf(example_train):\n try:\n \n with h5py.File(example_train, 'r') as f:\n\n group1_list = list(f.keys())\n print(bcolors.OKBLUE + 'First layer groups:',group1_list)\n\n group1 = f[group1_list[0]]\n group2_list = list(group1.keys())\n print(bcolors.OKBLUE + 'Second layer groups:',group2_list)\n\n freq.append(group1['frequency_Hz'])\n print(bcolors.OKBLUE + 'key:', 'frequency_Hz', ', shape:', group1['frequency_Hz'].shape)\n print(bcolors.OKBLUE + 'key:', 'H1', ', shape:', group1['H1']['SFTs'].shape)\n print(bcolors.OKBLUE +'key:', 'L1', ', shape:', group1['L1']['SFTs'].shape)\n\n except:\n print('Please check that this file is in your right directory !!') ","metadata":{"execution":{"iopub.status.busy":"2022-10-12T09:21:41.409625Z","iopub.execute_input":"2022-10-12T09:21:41.409964Z","iopub.status.idle":"2022-10-12T09:21:41.418151Z","shell.execute_reply.started":"2022-10-12T09:21:41.409929Z","shell.execute_reply":"2022-10-12T09:21:41.417194Z"},"trusted":true},"execution_count":null,"outputs":[]},{"cell_type":"markdown","source":"Now you have all the paths of train data and test data in the list, you just have to call the function/method name \"read_hdf\" and pass the list with it's index to get the details of your data :)","metadata":{}},{"cell_type":"code","source":"for i in range(3):\n print(bcolors.HEADER + f'===== {i} Link =====')\n read_hdf(train_paths[i])","metadata":{"execution":{"iopub.status.busy":"2022-10-12T09:21:41.419213Z","iopub.execute_input":"2022-10-12T09:21:41.419537Z","iopub.status.idle":"2022-10-12T09:21:41.473887Z","shell.execute_reply.started":"2022-10-12T09:21:41.419506Z","shell.execute_reply":"2022-10-12T09:21:41.472723Z"},"trusted":true},"execution_count":null,"outputs":[]},{"cell_type":"markdown","source":"# **DATA PROCESSING AND SPECTROGRAMS:**\n\n* Created a function which will read the data from every single hdf file and returns a dictionary of the data, which contain some features: Frequency, H1 SFTs, H1 Timestamps, L1 SFTs and L1 Timestamps. \n\n* These features are useful in terms of plotting the spectrogram.\n\n* You wonder what is spectrograms in audio ? Here is the Answer to your question: A spectrogram is a visual representation of the spectrum of frequencies of a signal as it varies with time. When applied to an audio signal, spectrograms are sometimes called sonographs, voiceprints, or voicegrams (Wikipedia)\n","metadata":{}},{"cell_type":"markdown","source":"sg = spectrogram, this is a raw energy spectrogram. stft = short-time fourier transform. stft returns a complex result with a real component, the magnitude, and a complex part, the phase. we use the magnitude part which is useful now.","metadata":{}},{"cell_type":"code","source":"# reference from the kernel: https://www.kaggle.com/code/edwardcrookenden/g2net-getting-started-eda#Plotting-Spectograms-%F0%9F%93%8A\n\n\ndef read_gw_data(data_path):\n \n store_data = {}\n \n try:\n \n with h5py.File(data_path,'r') as s:\n \n _id = list(s.keys())[0]\n store_data['ID'] = _id\n \n store_data['freq'] = np.array(s[_id]['frequency_Hz']) # because we need the data into Numpy array for further process\n \n # This is for Hanford Dataset\n \n store_data['H1_SFTs'] = np.array(s[_id]['H1']['SFTs'])\n store_data['H1_timestamps'] = np.array(s[_id]['H1']['timestamps_GPS'])\n \n # This is for Livingston Dataset\n \n store_data['L1_SFTs'] = np.array(s[_id]['L1']['SFTs'])\n store_data['L1_timestamps'] = np.array(s[_id]['L1']['timestamps_GPS'])\n \n store_data['Target'] = train_label.loc[train_label.id==_id].target.item()\n \n return store_data\n except:\n\n\n print('Check the Path that you entered !!')\n return None","metadata":{"execution":{"iopub.status.busy":"2022-10-12T09:23:22.832926Z","iopub.execute_input":"2022-10-12T09:23:22.833355Z","iopub.status.idle":"2022-10-12T09:23:22.842456Z","shell.execute_reply.started":"2022-10-12T09:23:22.833316Z","shell.execute_reply":"2022-10-12T09:23:22.841651Z"},"trusted":true},"execution_count":null,"outputs":[]},{"cell_type":"code","source":"data = read_gw_data(train_paths[0])","metadata":{"execution":{"iopub.status.busy":"2022-10-12T09:23:26.346875Z","iopub.execute_input":"2022-10-12T09:23:26.347284Z","iopub.status.idle":"2022-10-12T09:23:27.021866Z","shell.execute_reply.started":"2022-10-12T09:23:26.347239Z","shell.execute_reply":"2022-10-12T09:23:27.021052Z"},"trusted":true},"execution_count":null,"outputs":[]},{"cell_type":"code","source":"plt.figure(figsize=(22,24))\nplt.subplot(4,3,1)\nplt.title('H1 Short-time Fourier Transforms')\nsg_mag, sg_phase = librosa.magphase(data['H1_SFTs'])\nsg1 = librosa.feature.melspectrogram(S=sg_mag)\ndisplay(librosa.display.specshow(sg1))\nplt.subplot(4,3,2)\nplt.title('L1 Short-time Fourier Transforms')\nsg_mag, sg_phase = librosa.magphase(data['L1_SFTs'])\nsg1 = librosa.feature.melspectrogram(S=sg_mag)\ndisplay(librosa.display.specshow(sg1))\n\ndel sg_mag\ndel sg1\ndel sg_phase\ngc.collect()","metadata":{"execution":{"iopub.status.busy":"2022-10-12T09:23:28.688089Z","iopub.execute_input":"2022-10-12T09:23:28.689423Z","iopub.status.idle":"2022-10-12T09:23:30.531585Z","shell.execute_reply.started":"2022-10-12T09:23:28.689382Z","shell.execute_reply":"2022-10-12T09:23:30.530372Z"},"trusted":true},"execution_count":null,"outputs":[]},{"cell_type":"markdown","source":"we can find some pinkish lines in the spectrogram but they are not much clear to understand.\n\n# **More About Short-Time Fourier Transforms (SFTs)**\n\n\nThe reason of using short-time fourier transforms is that instead of using Fourier Transforms on entier signal, we break up the signal into small batches( chunks ) and compute the FT of each batch to see how the frequencies of the signal changes over time, this means that we zoom in the Signal and try to explore deeply.\n\n\nSuppose we have SFTs of every or wave and now we try to analyze them through spectrograms.","metadata":{}},{"cell_type":"code","source":"data = read_gw_data(train_paths[2])\nmain_data = abs(data['H1_SFTs'])\nmain_data = librosa.feature.melspectrogram(S=main_data, n_fft=450, n_mels=128)\ndisplay(librosa.display.specshow(main_data,x_axis='time'))\nplt.colorbar()\n\ndel main_data\ndel data\ngc.collect()","metadata":{"execution":{"iopub.status.busy":"2022-10-12T09:24:15.862347Z","iopub.execute_input":"2022-10-12T09:24:15.862758Z","iopub.status.idle":"2022-10-12T09:24:17.753645Z","shell.execute_reply.started":"2022-10-12T09:24:15.862724Z","shell.execute_reply":"2022-10-12T09:24:17.752588Z"},"trusted":true},"execution_count":null,"outputs":[]},{"cell_type":"markdown","source":"**n_fft:** The n_fft is making our images taller,and more spaced out. I did not used fastai's Image Function but you can use Fastai's Image function and then you can play around with these parameters like n_fft and hop_length and etc. Thus when we increase n_fft in our stft, we have more resolution in the frequency dimension, and can distinguish between more possible frequencies. If we set the n_fft too low, they all get smashed together.\n\n**hop_length:** So hop_length does something to alter the width of the spectrogram. It is use for changing the width of Images, but it is important to use for analyzing. we can resize images to check the chunks of signals.","metadata":{}},{"cell_type":"markdown","source":"## **Data Generation**\n\nThe amount of data is not too much, so we have to generate our own data. we use Pyfstat module to generate our own data, If you want to learn more about Pyfstat, here is the Link where it is discussed: [How to generate your own data](https://www.kaggle.com/competitions/g2net-detecting-continuous-gravitational-waves/discussion/347052)\n","metadata":{}}]}